Tags
In Codex, you can easily create and manage tags through a dedicated interface, which facilitates easy access and improves the SEO for your content.
Tags in Codex are entities that are implemented at the site level, allowing each individual site to have its unique set of specific tags. Tags can be created using two methods, including:
Tag management page
At entry level
Note that for viewing, creating, and managing tags, you must have the appropriate permissions under the Content permissions. To learn more about Tag permissions, please refer to the Teams and Permissions resource.
Tag Management Page
The Tag Management feature in Codex provides a site-level environment for users to create, manage, and delete tags associated with their respective sites. To access the Tag management page, navigate to the "Tags" link on the left side menu after selecting the desired site. Within the Tag management interface, you will find a Tag Listing Dashboard that displays the following columns:
Name of the tag.
Source of the tag, indicating if the tag was created manually in Codex, or from third-party tools (such as tag recommendation tools).
Action buttons represented by three dots, which provide options to edit and delete the tag.
Note that it is not possible to delete a tag that has child tags in its hierarchy, that has referenced entries, and if it is used in entries.
Arrows at the beginning of the tag name, allowing you to expand and view any child tags associated with it.
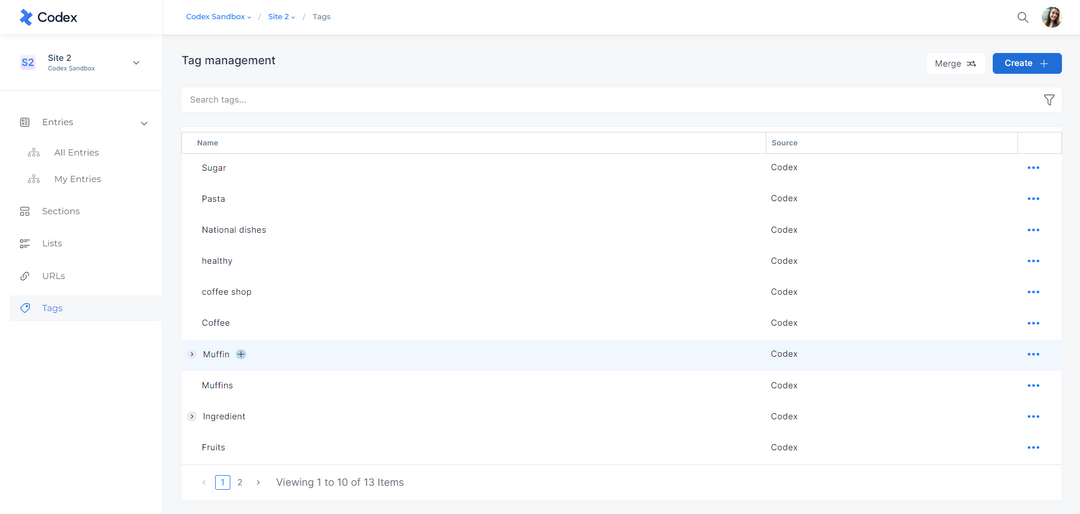
Tag management interface
Located at the top of the Tag management page is a search bar where you can search for any tag, including parent and child tags. The search results for child tags will also display their hierarchical path (e.g., parent/child1/child2).
On the right side of the search bar, you'll see a filter icon that allows you to filter the tags based on various criteria, such as Parent Tag, References, and Source.
In the top-right corner, you will find the "Create" button to create a new tag. Additionally, there is a "Merge" button that facilitates the merging of one or more tags into a target tag. Further details regarding the merging process will be explained later in this article.
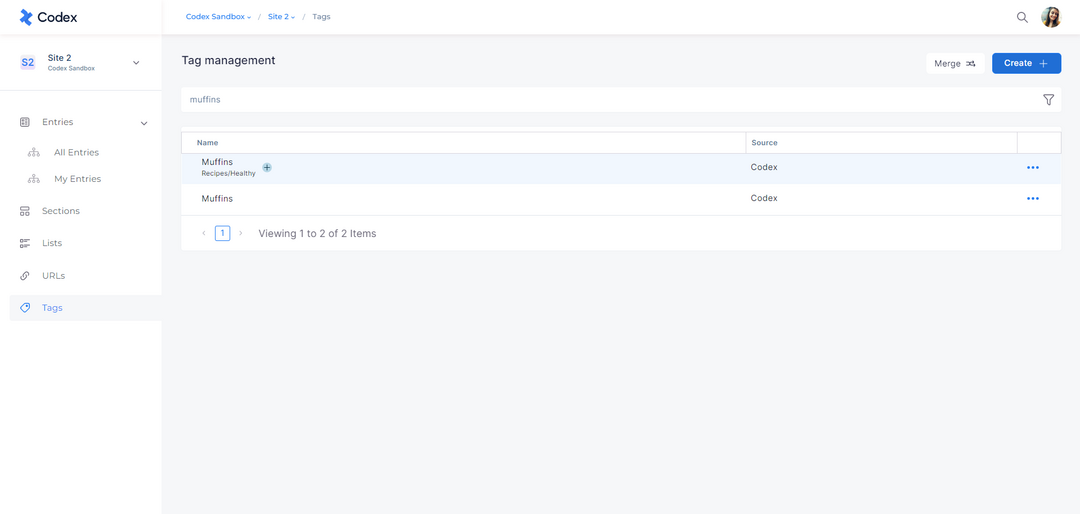
Searching in Tag management
Creating a New Tag
To create a new tag in Tag management page, follow the steps below:
Click the "Create" button located at the top-right corner of the page.
A new modal window will open on the right side of the screen, displaying the "Details" tab.
Within the "Details" tab, you will find metadata fields that need to be filled out:
Name: Enter a descriptive name for the new tag.
Description (optional): Provide a clear and concise description or indicate the purpose of the tag.
Parent (optional): If you want the new tag to be a child tag of an existing parent tag, specify the parent tag.
Referenced entries (optional): If you want the tag to be referenced in specific entries within your site, indicate the relevant entries.
After filling in the necessary information, click the "Save" button located at the bottom of the modal.
The newly created tag will appear in the Tag Listing Dashboard, and can be used in the Tag Field of an entry.
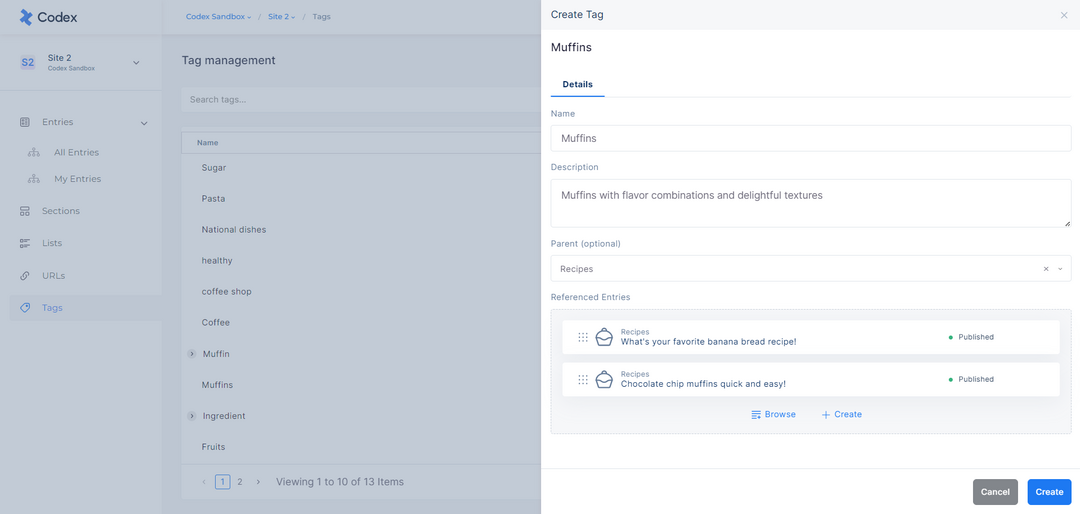
Create Tag modal
Note that you can also create a parent tag along with its child tags simultaneously by using the "/" symbol between them. For example, "parent/child1/child2" will create a hierarchy starting from the "parent" tag down to the "child2" tag.
Editing a Tag
To edit a tag, you can easily click on the tag listed, which will open a modal with three tabs:
Details: This tab contains the metadata of the tag, including its name, description, and other relevant information.
Usage: In this tab, you can view all the entries where the tag is currently being used. You also have the option to search and filter for specific entries within this section.
Child Tags: If the tag has any child tags associated with it, this tab will display the hierarchical structure starting from the first child and descending further.
Located at the top-right of the modal is the "Merge" button. This feature allows you to merge the selected tag with another target tag, enabling consolidation and organization of tags with similar purposes or meanings.
Merging Tags
To merge one or multiple tags into a target tag, follow the steps below:
Click on the "Merge" button located at the top-right corner of the Tag management page.
A new modal window will appear, presenting two tag selection fields:
Select tags to merge: Choose the tags you wish to merge into the target tag.
Select target tag: Specify the target tag that will absorb the merged tags.
After selecting the appropriate tags, click the "Merge" button at the bottom of the modal.
The selected tags will be merged into the designated target tag.
In entries where the merged tags have been used, they will be replaced with the target tag.
Please take note of the following cases where merging tags is not possible:
It is not possible to merge a parent tag into its child tag.
It is not possible to merge tags that have referenced entries.
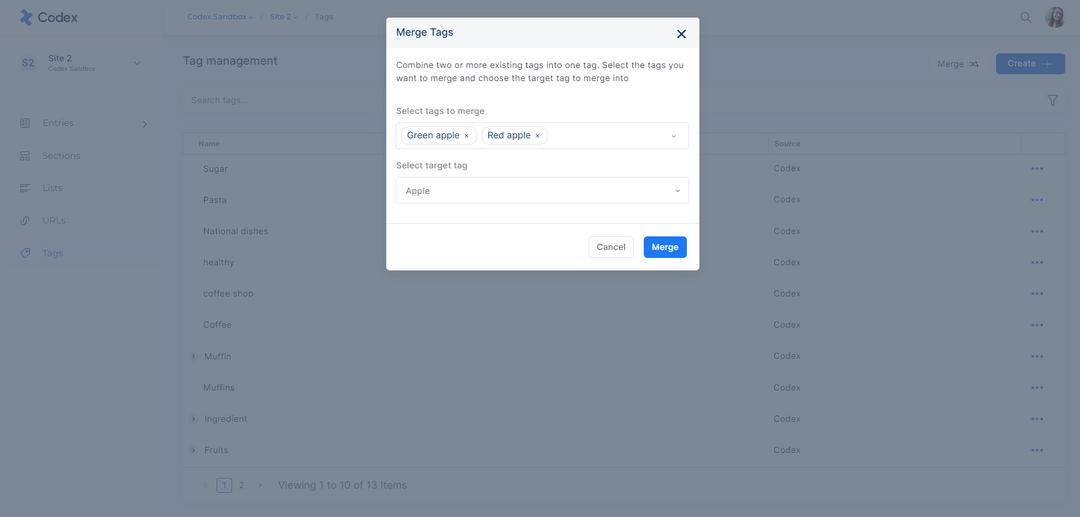
Merge Tags modal
Tags at Entry Level
In addition, at the entry level, you have the ability to create, add, and use tags in the Tag Field of an entry, depending on your permissions.
There are two possibilities for adding tags at the entry level:
Free text: To add tags using free text, locate the Tag Field within the entry and manually enter a word or phrase. Once you have entered the desired tag, press the enter key on your keyboard. This action will add the tag to the Tag Field of the entry and it will also be included in the Tag Management page as a parent tag.
Suggested tags: By clicking on the Tag Field, a dropdown menu will appear, displaying tabs representing tags saved in the Tag Management page and third-party APIs like Dandelion or Geneea, depending on the integration within your organization. These tools analyze the content of the entry and generate suggested tags that are relevant to the entry's content. Suggested tags can then be selected from the dropdown menu for easy and accurate tagging of the entry.
Please note that the tag created in the Tag Field of an entry will be saved in the Tag Management page only after the entry has been published.
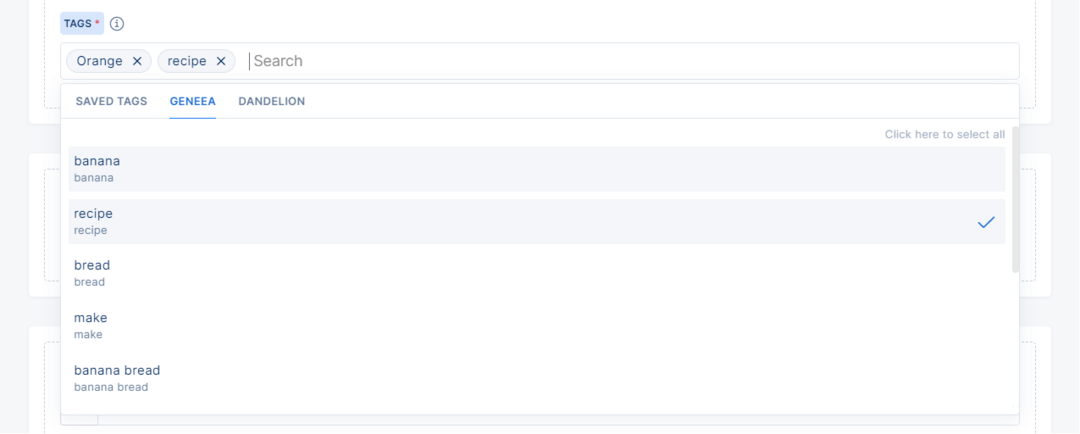
Adding tags in Tag field in an entry

