
Integrations

In Codex, integrations can be used to extend the capabilities of the platform and connect it to other relevant systems and applications.
Integrations refer to the process of exchanging data between two or more software systems. Codex offers pre-built integration options that the whole organization can readily employ.
To access the integrations available for an organization in Codex, follow these steps:
Navigate to the Administration component in the left side menu.
Select the Integrations link from the left side menu.
You will be directed to the Integrations dashboard.
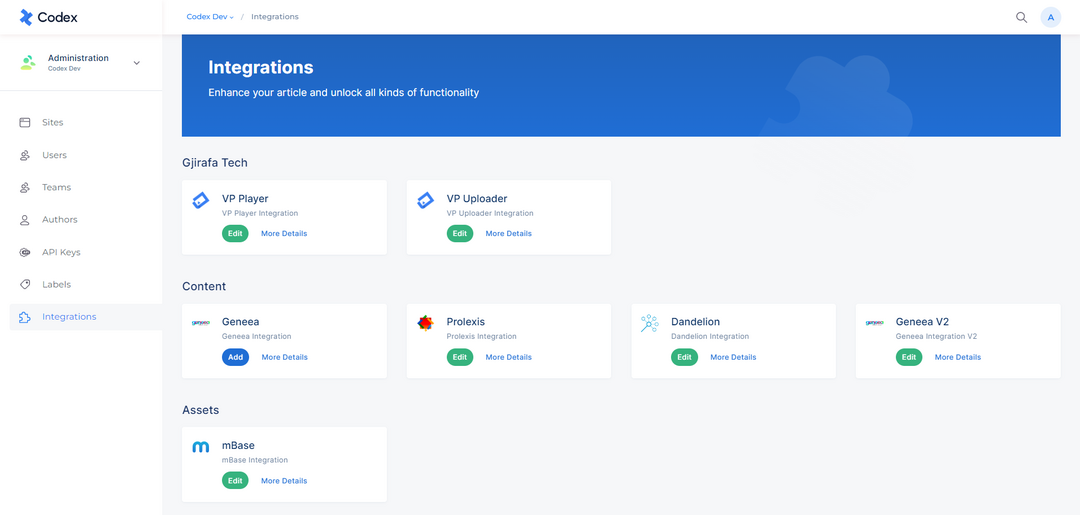
Integrations Dashboard
In Codex, integrations are categorized into the following categories: GjirafaTech, Content, and Assets. The following provides a brief overview of each category and the integrations that are included in each.
GjirafaTech
This category includes integration with the GjirafaTech ecosystem product VP platform, which connects Codex with VP to enable the use of videos and audios in the content.
VP Player
The first requirement to initiate a new connection with VP Player is to gain access to your profile account on your organization's VP Player platform. For detailed information on how to access your profile account, please refer to the VP User Guide documentation.
The VP Player integration connects Codex with VP's video library, which provides adaptive and customizable video streaming services and includes a comprehensive video ecosystem.
Follow the steps below to create a new connection with VP Player:
Click on the "Edit" button beneath the VP Player Integration to open the modal containing Integration Details.
Click on the "+ Add new connection" button at the bottom of the Integrations list.
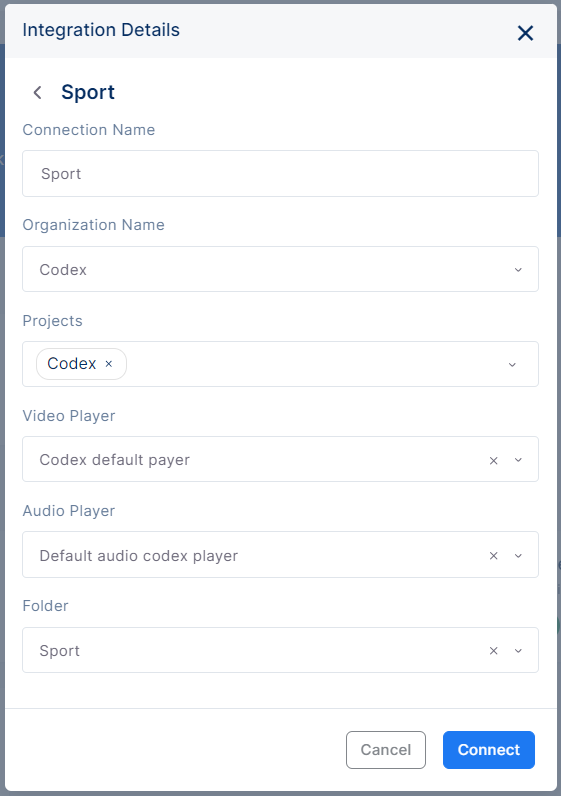
You will see several fields for the new connection that require completion, including:
Connection Name: Allows you to insert the name of the connection that will be displayed in the Connections list of the VP Player Integration.
Organization Name: Offers a dropdown list of the organizations that you have access to in the VP Player platform. You can choose the desired organization for the corresponding connection.
Projects: Offers a dropdown list of projects that are part of the chosen organization above and that you have access to in the VP Player platform. You can select the desired project for the corresponding connection.
Video Player: Offers a dropdown list of video players from the chosen project in the VP Player platform. You can select the desired video player for the corresponding connection.
Audio Player: Offers a dropdown list of audio players from the chosen project in the VP Player platform. You can select the desired audio player for the corresponding connection.
Folder: Allows you to select the folder in the Asset Management Hub where you want the videos/audios uploaded to be integrated into Codex for the chosen organization, project, video player, and audio player above.
Once all fields are complete, click the "Save" button at the bottom of the modal and the connection will be established
This connection will allow the uploaded videos/audios to be integrated into the corresponding project of the organization in VP Player to the selected asset folder in Codex. Note that multiple connections can also be established in Codex for the purpose of integrating multiple VP project videos and audios.
Each connection includes two quick action buttons: one to edit the connection and another to disconnect the selected connection.
VP Uploader
VP Uploader enables Codex users to upload videos and audios directly to VP Player. When you upload videos and audios in the Asset Management Hub, they will be added to Codex based on the configuration of the VP Uploader integration.
To configure the VP Uploader integration, only one connection can be added. The required fields to fill out when adding the connection are Connection Name, Organization Name, and Projects of the organization on the VP platform.
Please note that each time you wish to add a new project within the VP Uploader integration, you must first disconnect the integration with VP, then add a new one, and select the desired projects of the VP Player organization.
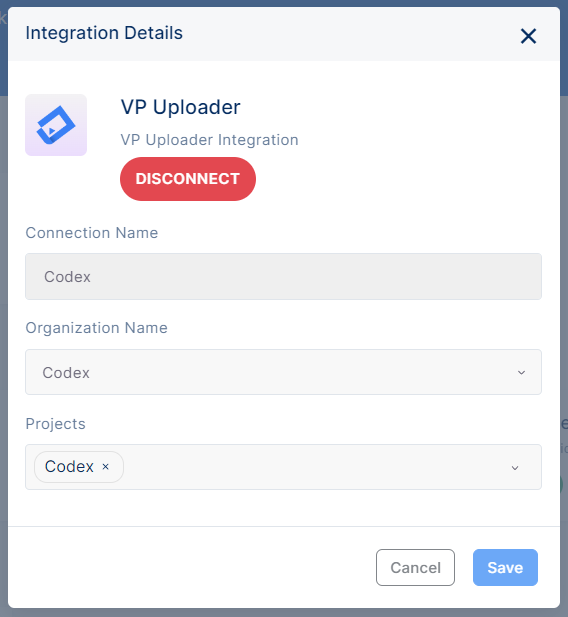
Adding connection in VP Uploader integration
After configuring this integration, the following steps outline a basic uploading process of videos/audios from Codex directly to VP:
In the Asset Management Hub, click on the "Upload" button and select the desired videos/audios from your device
A side modal will open, allowing you to select the desired project in VP where you want to upload the selected videos/audios
Click on the Save button, and the video/audio upload will commence
Once completed, the uploaded video/audio will be displayed in the chosen asset folder for the corresponding project (as configured in the VP Player integration connections)
To learn more about uploading videos/audios on the Codex platform, you can refer to the Working with Assets documentation for detailed information about its features and functionality.
Content
Content integration expands content writing capabilities through the use of various external integrations such as Geneea, Prolexis, and Dandelion.
Geneea
Geneea is a third-party API text analytics tool that can generate tags from content created in Codex. The tags are generated based on the context of the content, which enables editors to add them to their articles. Each site can be assigned a unique API key, and it is also possible to create multiple connections.
Follow the steps below to create a new connection with Geneea:
Click on the "Edit" button beneath the Geneea Integration to open the modal containing Integration Details.
Click on the "+ Add new connection" button at the bottom of the Integrations list.
You will see several fields for the new connection that require completion, including:
Connection Name: the name that will be displayed in the Connections list.
Api Key: the unique API key associated with your organization's account on the Geneea platform.
Sites: allows you to select the sites of your organization to use this connection.
Once all fields are complete, click the "Connect" button at the bottom of the modal.
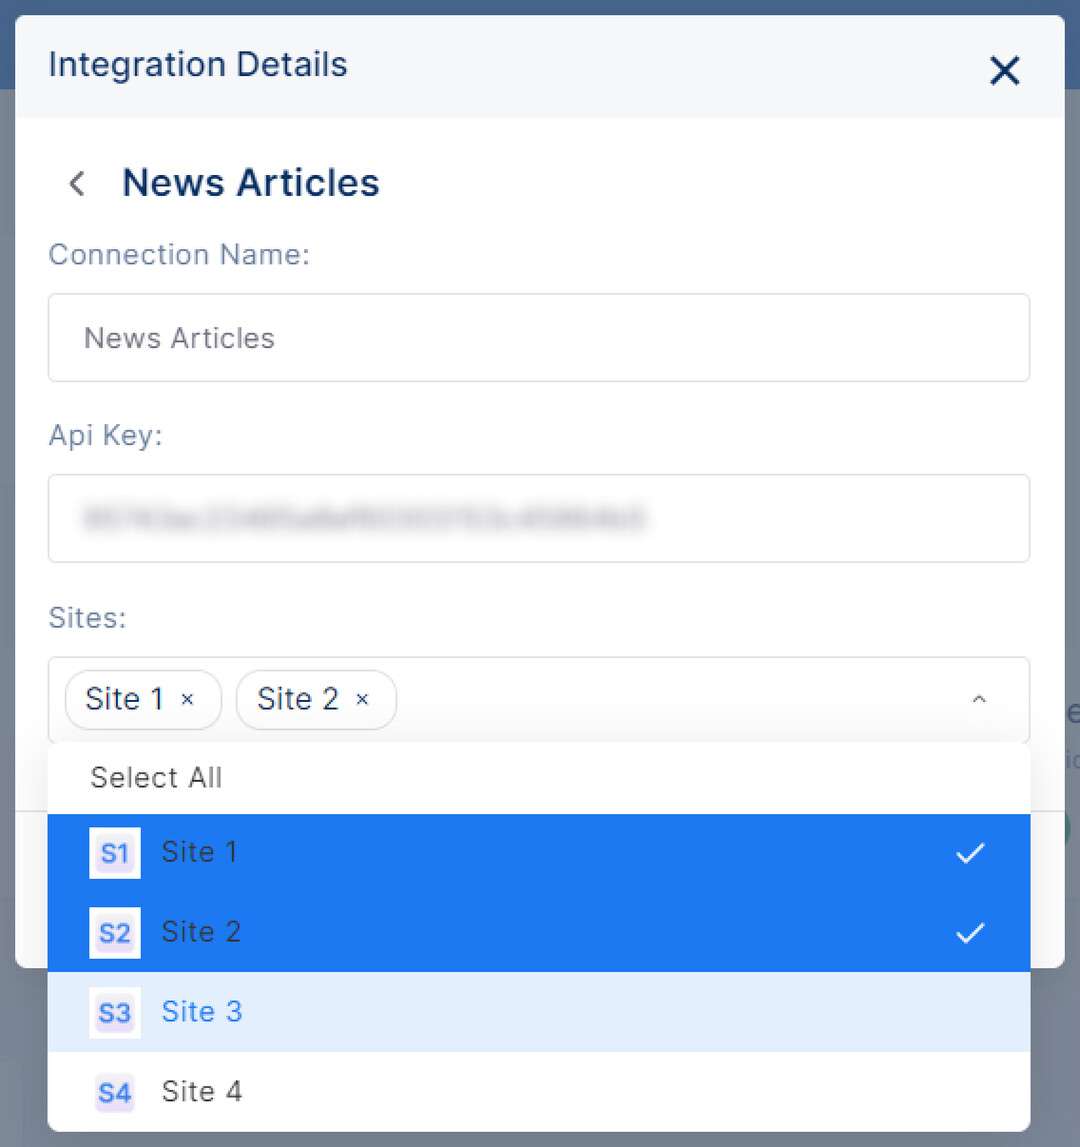
Adding a new connection in Geneea integration
While editing an article in the entry editor, after adding content to the main body of the article, you can add tags that have been generated by Geneea based on the context of the content.
Prolexis
Prolexis is a third-party API text correction tool that can be used in Codex to correct the content created in articles. This tool allows editors to improve the quality of their articles while saving time by providing automated text correction. Each site can be assigned a unique API key, and it is also possible to create multiple connections.
Prolexis is a professional text correction tool specifically designed for the French language.
Follow the steps below to create a new connection with Prolexis:
Click on the "Edit" button beneath the Prolexis Integration to open the modal containing Integration Details.
Click on the "+ Add new connection" button at the bottom of the Integrations list.
You will see several fields for the new connection that require completion, including:
Connection Name: the name that will be displayed in the Connections list.
Api Key: the unique API key associated with your organization's account on the Prolexis platform.
Sites: allows you to select the sites of your organization to be included in this connection.
Once all fields are complete, click the "Connect" button at the bottom of the modal.
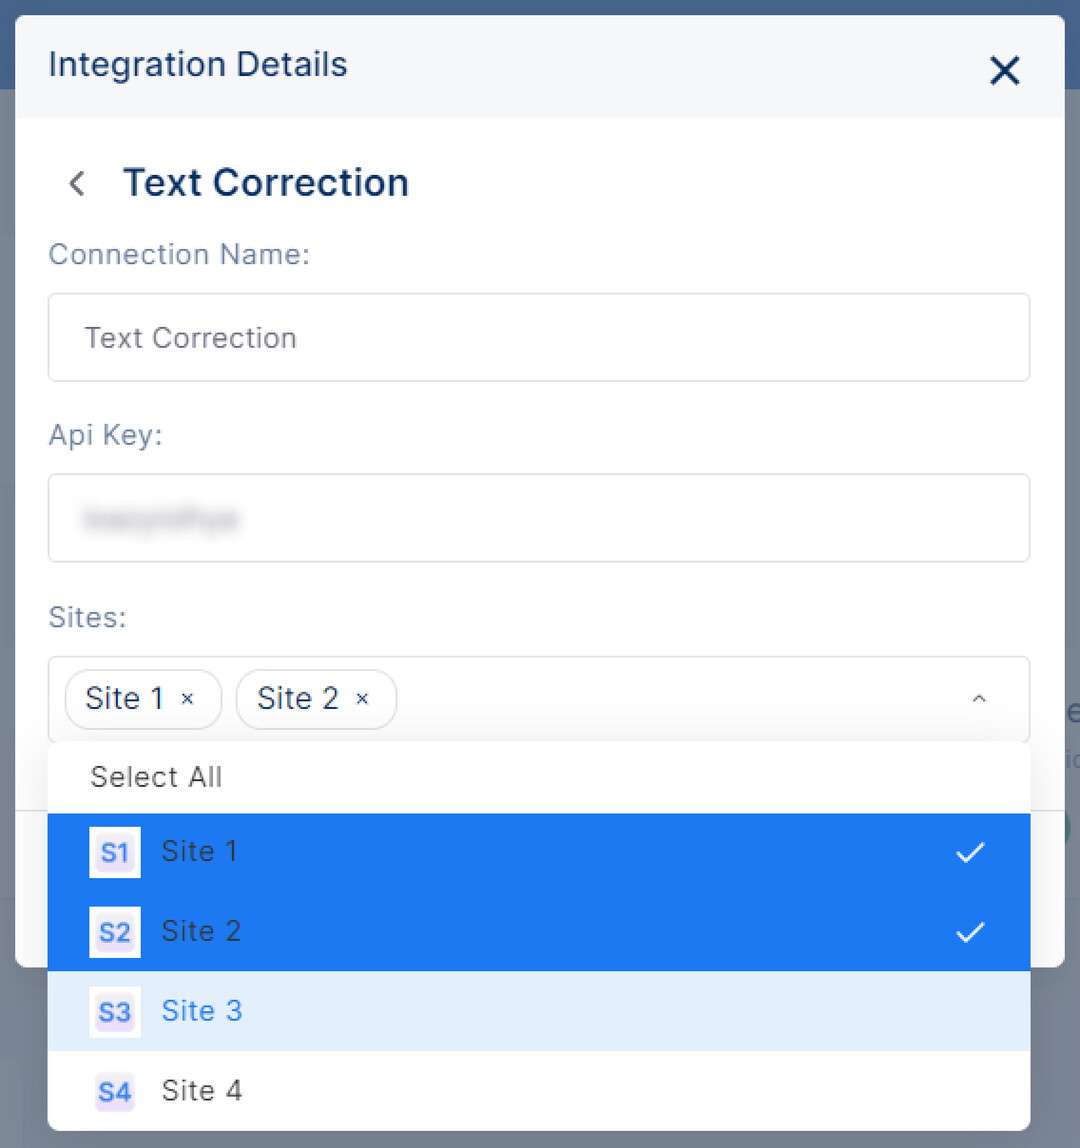
Adding a new connection in Prolexis integration
Dandelion
Dandelion is a third-party API text analytics tool that can generate tags from content created in Codex. The tags are generated based on the context of the content, which enables editors to add them to their articles. Each site can be assigned a unique API key, and it is also possible to create multiple connections.
Follow the steps below to create a new connection with Dandelion:
Click on the "Edit" button beneath the Dandelion Integration to open the modal containing Integration Details.
Click on the "+ Add new connection" button at the bottom of the Integrations list.
You will see several fields for the new connection that require completion, including:
Connection Name: the name that will be displayed in the Connections list.
Api Key: the unique API key associated with your organization's account on the Dandelion platform.
Parameters: additional parameters that can be added to customize the connection, consisting of a key and a value.
Sites: allows you to select the sites of your organization to be included in this connection.
Once all fields are complete, click the "Connect" button at the bottom of the modal.
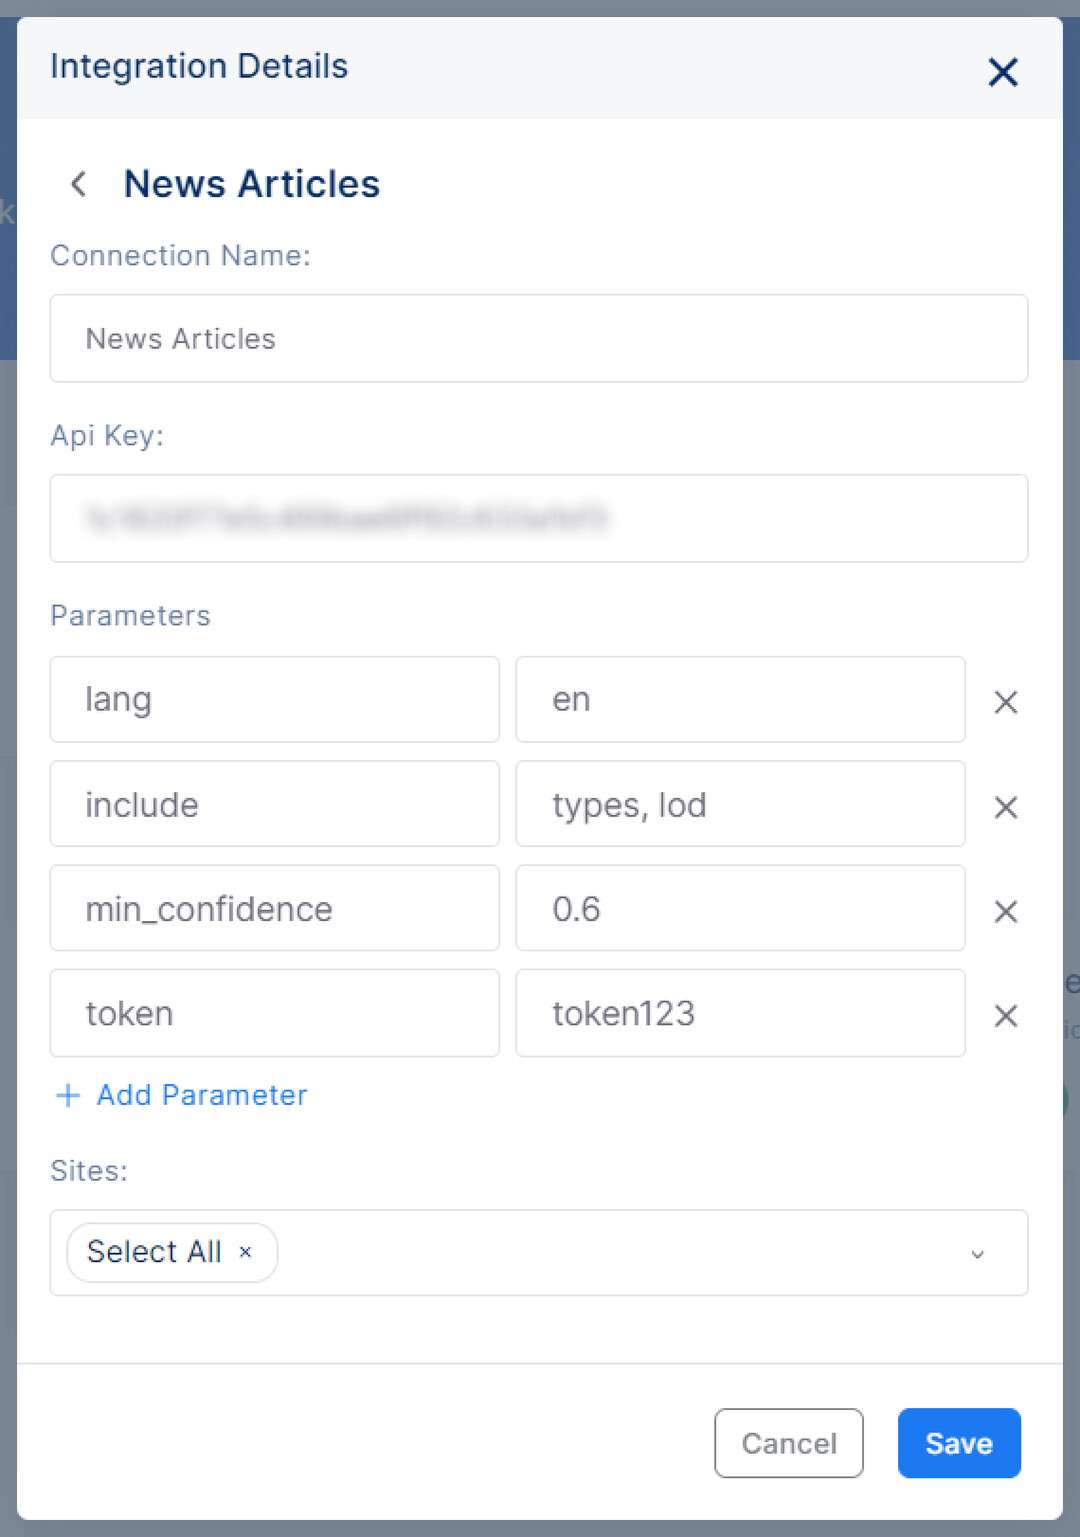
Adding a new connection in Dandelion integration
While editing an article in the entry editor, after adding content to the main body of the article, you can add tags that have been generated by Dandelion based on the context of the content.
Assets
Assets integration allows users to access and utilize external digital asset management software, such as mBase.
mBase
mBase is an external photo library tool that can store and manage digital assets, which can then be incorporated into content created within the Codex platform. This tool is particularly useful for organizations that use other digital asset management software and want to upload and use those assets within Codex. With the mBase Integration, a single connection can be added. When adding a connection, the required fields to fill out are the URL and API key of the organization on the mBase Platform.
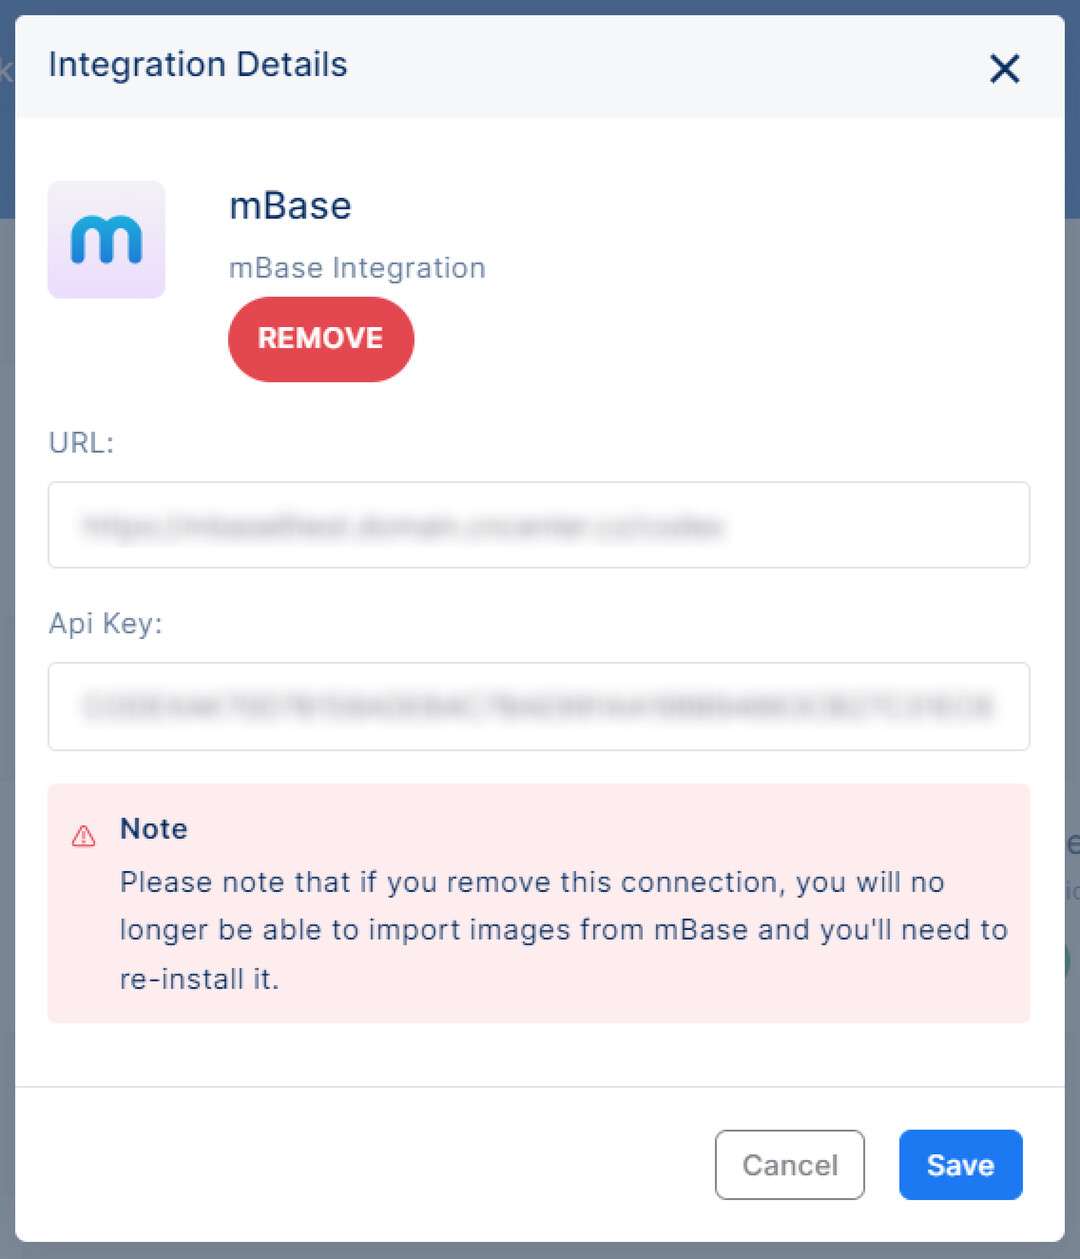
Adding connection in mBase integration
Please note that if you remove this connection, you will no longer be able to import images from mBase and you'll need to re-connect it.