
Lists

Lists are groups of entries that can be created on site level to organize them according to specific requirements or preferences, and can serve a variety of purposes.
Lists are collections of entries that can be organized based on your preferences or requirements. For instance, you have the option to choose several article entries and display them as "Editorial Picks" to showcase on your Homepage. You have the flexibility to manually arrange these entries in a specific order. Additionally, you can schedule entries to appear on the list within a designated time frame, such as from Friday at 18:00 to Sunday at 00:00.
Besides these manual lists, you have the option to create dynamic lists, which involve applying different filters to entries. Each entry that meets the criteria will automatically be added to the list. For example, you can filter by the "Recipes" section and then by the tag "muffin". All entries that are part of the "Recipes" section and tagged with "muffin" will be displayed in this list.
To access the entries lists, follow these steps:
Navigate to the desired site in your organization.
In the left side menu, click on "Lists". This will display two types of lists:
Manual
Dynamic
Clicking on each type will direct you to a page containing a list of all the Lists that have been created on the site.
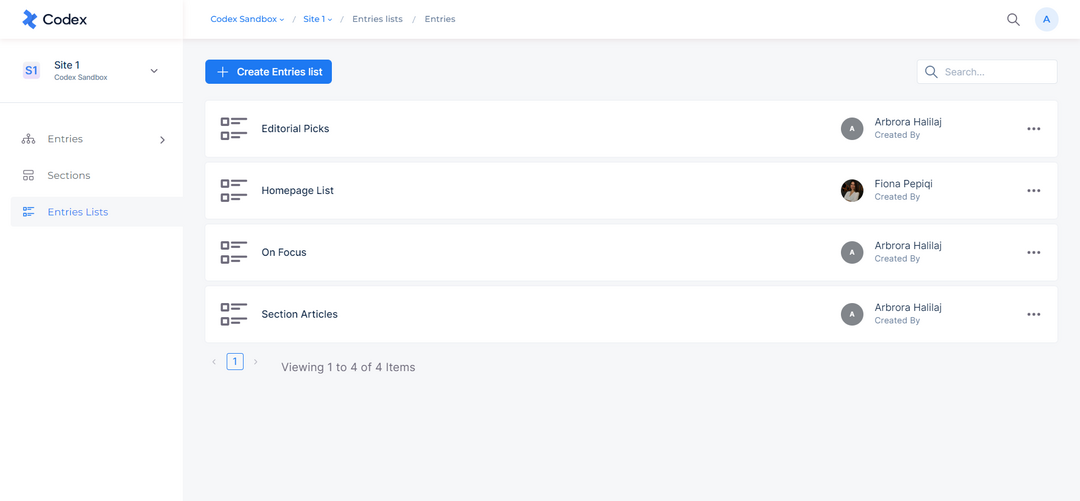
Lists
The Lists page displays information about each list, including the list name, the user who created it, and options to edit or delete the selected list by clicking on the three dots. You can also use the search bar at the top-right of the page to quickly locate a specific list.
Creating a new Manual List
To create a new Manual List, follow these steps:
Navigate to the desired site in your organization.
In the left side menu, click on "Lists", and then click on "Manual List".
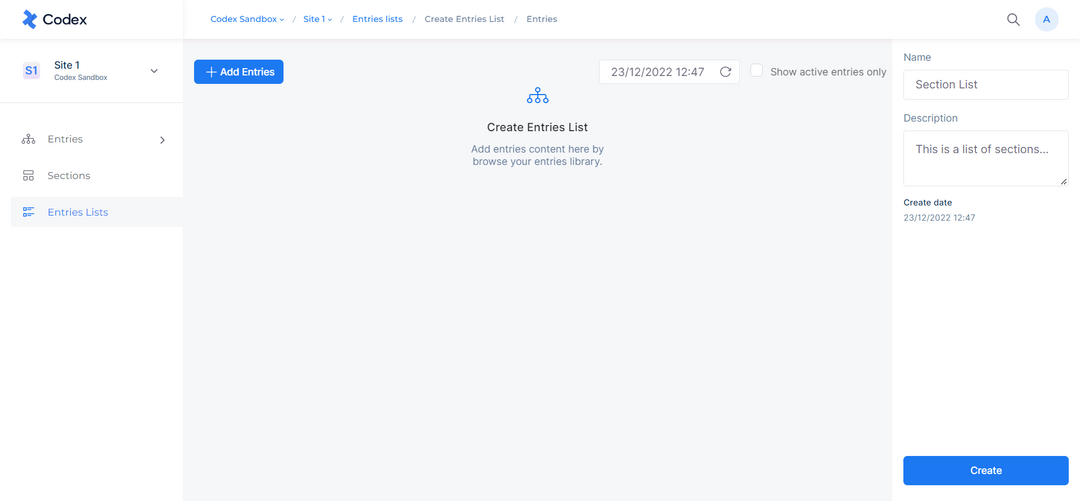
Click the "Create List" button located at the top-left of the page.
A new page will open with a side panel containing "General" and "Configuration" tabs.
In the "General" tab, input the metadata for the list, including the list name, alias, and description.
In the "Configuration" tab, you can select the model from which you want entries to be added to the list. By default, there are all models selected.
Click on the "Add Entries" button to browse and add entries to your list.
Fill in the metadata and add the desired entries to the list.
When you are finished, click the "Create" button at the bottom of the page.
Creating a new List
Note that you cannot create an empty Manual List; it must have at least one entry added to it.
Adding entries in the Manual List
To add entries to your Manual List, follow these steps:
Navigate to the list where you want to add entries.
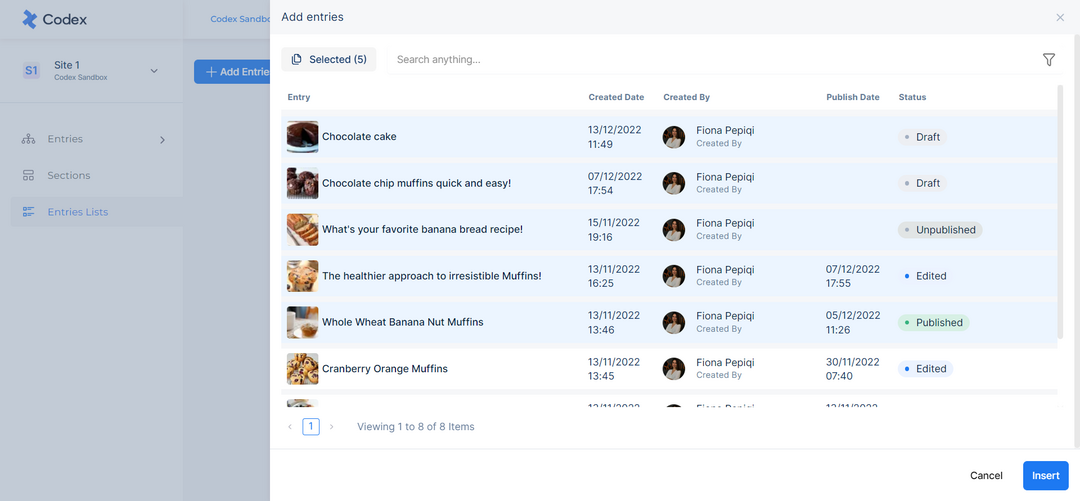
Click the "Add Entries" button located at the top of the list.
A slide modal will open, allowing you to select the entries you want to add to your list. You can use the search and filter options to help you locate the desired entries.
Once you have selected the entries you want to add, click the "Insert" button at the bottom of the slide modal.
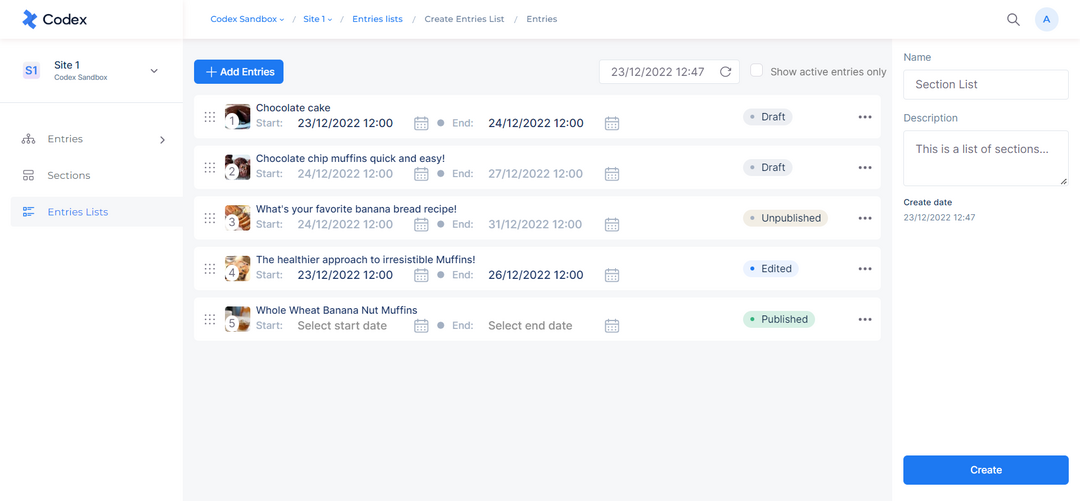
The selected entries will be added at the top of your List.
Click the "Save" button at the bottom right to save the list.
Adding entries in List
Organizing the Manual List
Entries that are added to a List are displayed with their image, title, and status. If you have the necessary permissions, you can click on the title of an entry to open a slide modal, where you can view and edit it. Additionally, you can perform various actions on the entries in your List:
Scheduling the entry: This allows you to set a Start and End date/time for the entry to be displayed on a list.
Reordering the entry: You can change the position of each entry within the List by dragging and dropping them into the desired position. The ordered numbers displayed within the entry's image indicate their current order within the List.
Removing the entry: This removes the entry from the List, but does not delete it. The entry may still appear in the "All Entries" list.
Clear expired entries - This action, found in the dropdown menu of the "Save" button, allows users to automatically remove expired entries from the list. It includes removing entries that were previously active but whose expiration date has passed.
Organizing the List
At the top of the List, you can use the "Show active entries only" checkbox to display only those entries that are currently active. You can also use the date picker to view entries that are active on a specific date/time.
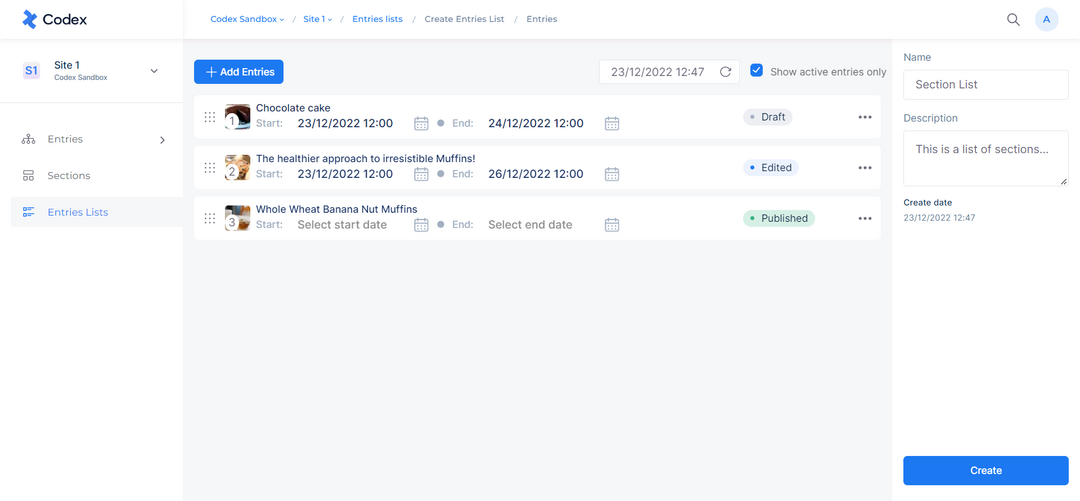
Using "Show active entries only" checkbox
Creating a new Dynamic List
To create a new Dynamic List, follow these steps:
Navigate to the desired site in your organization.
In the left side menu, click on "Lists", and then click on "Dynamic List".
Click the "Create List" button located at the top-left of the page.
A new page will be opened with fields for you to enter the metadata for the list, including the list name, alias and description.
Apply the desired filters to the entries at the top right of the list.
Entries that meet the criteria will be displayed in the list.
When you are finished, click the "Create" button at the bottom of the page.
Note that a Dynamic List automatically displays all entries that are in a Published status; therefore, users cannot filter entries by their status. Additionally, users cannot manually edit a Dynamic List.