
Labels

Labels are utilized for internal workflow management within Codex. The purpose of creating labels is to provide an additional layer of information for entries and assets, allowing users to organize and manage internal workflow processes more easily.
For instance, labels can be used to filter entries based on their status in the workflow process. Creating a label named "To Edit" provides additional information to editors that the entry needs additional editing before it can be published. This also allows for easy filtering and easy access to the desired entry. Once the editing is complete, the label can be updated to "To Publish" and entries can be filtered accordingly for quick publishing. Furthermore, labels can be utilized to set permissions based on labels and allow access only to content that contains a specific label.
This feature of using labels provides a systematic way of managing and tracking the different status of entries, makes it easy to identify entries at different stages of the workflow and ensures accurate and efficient management of the entries.
To access the Labels, navigate to the Administration component in the left side menu, then select the Labels link. This will direct you to the Labels Listing Dashboard, where all the labels that have been created will be displayed, along with quick actions such as Edit and Delete to manage the specific labels.
Considering that Labels are created in organization level, they are available to be added in the entries of all sites of the organization, as well as to the organization's assets.
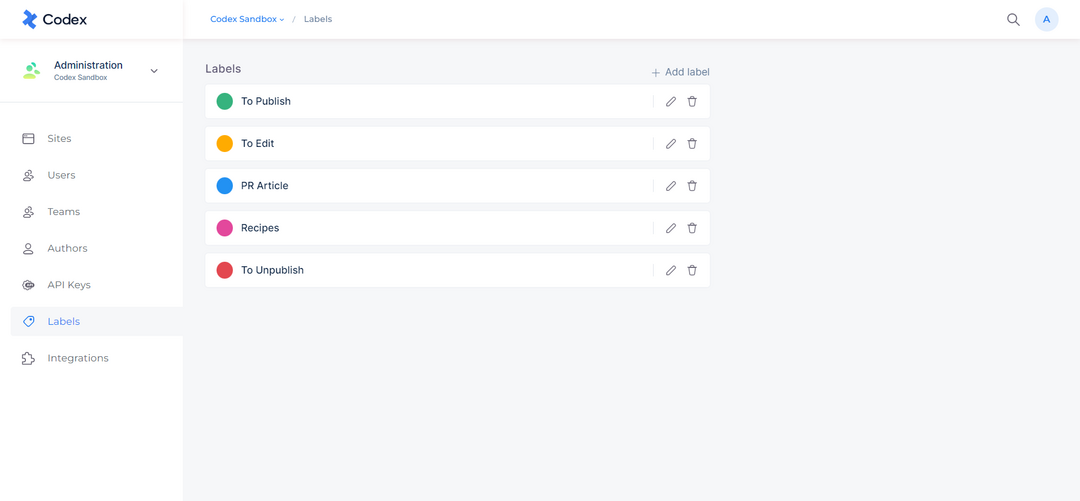
Labels Listing Dashboard
Adding a new label
To create a new Label within your organization, follow these steps:
Navigate to the Administration component in the left side menu.
Select the Labels link from the left side menu.
On the Labels Listing Dashboard, click the “+ Add label” button located at the top-right corner.
A new modal will appear on the right side, with fields to be filled for the label's metadata, including:
Name: The name of the label.
Entities: The entities where the label can be used, which can include assets, entries, or both.
Site: The site where the label can be applied to entries. This option will be displayed only if the Entity is chosen as Entry.
Description: A brief description of the label's purpose.
Color: A color can be selected to aid in identifying the label.
Once the metadata fields are filled in, click the "Create" button to create the new label.
The new label will be added to the Labels Listing Dashboard.
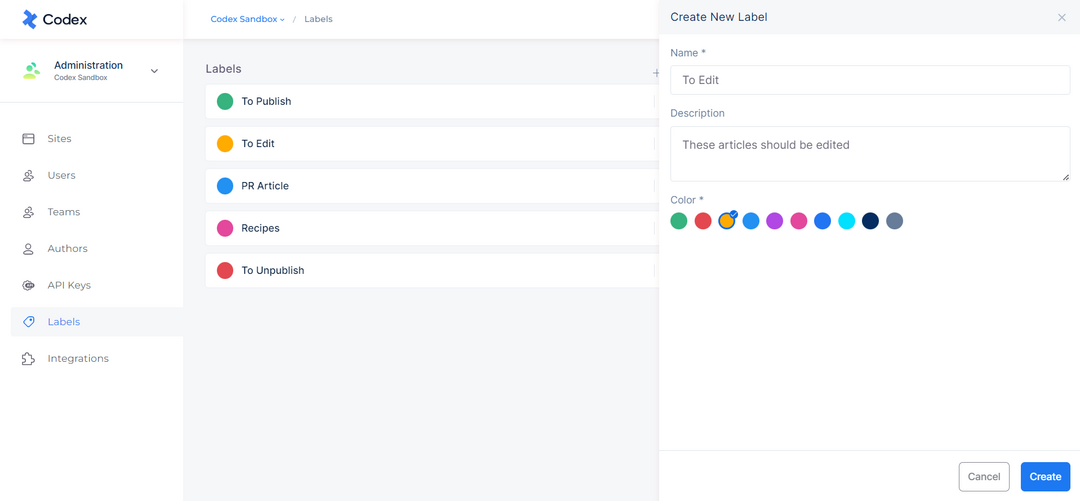
Adding a new label
Adding a label to an entry
To add a Label to an Entry for a specific purpose, follow these steps:
Open the entry you are working on or the entry you want to add the label to.
Locate the "Labels" section on the right side panel.
Click on the "+Add" button next to the Labels section.
From the dropdown menu, select the label you want to add to the entry.
The label will be automatically saved into the selected entry.
Note that you can view and add labels to the entry only if you have the appropriate permissions for those labels.
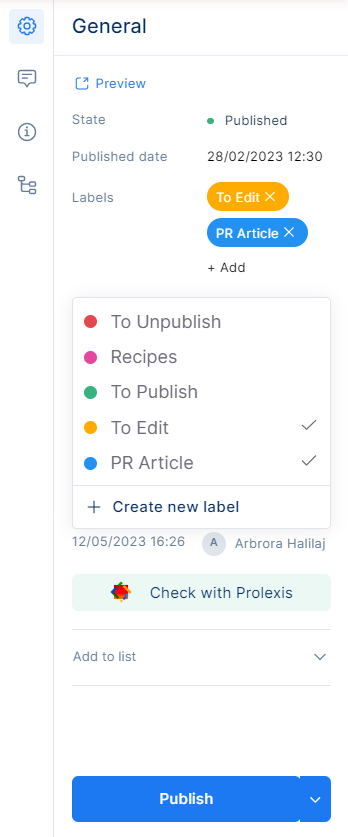
Adding entry to labels on the right Side Panel
Adding a label to an asset
To add a Label to an Asset for a specific purpose, follow these steps:
Open the asset to which you want to add the label.
Locate the "Labels" section on the right side panel.
Click on the "+Add" button next to the Labels section.
From the dropdown menu, select the label you want to add to the asset.
Click the "Save" button to save the metadata.
The label will be added to the asset.
Note that you can view and add labels to the asset only if you have the appropriate permissions to edit labels on assets.