
Getting Started with Content Creation

The Content Editor is the main environment for content creators to craft their stories. Here, they can create, edit, share, and collaborate with other content creators to build successful stories.
Content creation in Codex is organized at the site level. To create an entry, you will begin by navigating to the specific site within your organization for which you want to create content. Each site can contain its own entries, which can also be shared or circulated with other sites within the organization.
Watch Demo

Entry Listing & Quick View Demo
Entry Listing Dashboard
The Entry Listing Dashboard will be your first touchpoint within the site's content interface. From here, you can search for content using various filtering options, edit existing entries, or create a new entry from scratch.
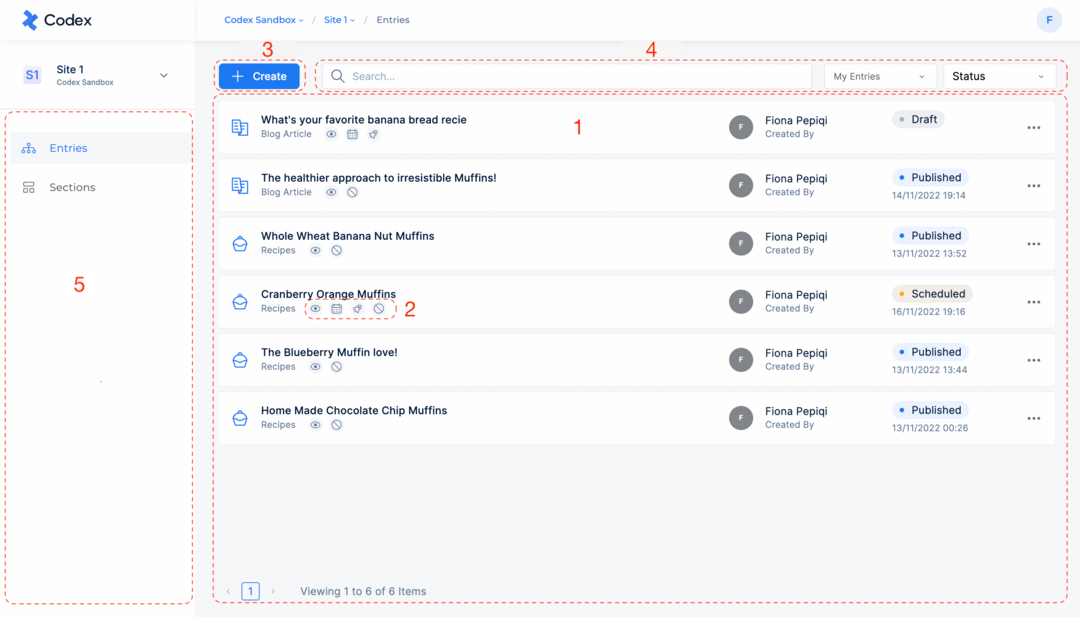
Entry Listing Dashboard
1) The Entry Table view provides a comprehensive list of all entries created within your site. Within this view, you can access information such as the entry's title, author, status, and other relevant details. Furthermore, by selecting the three dots, you can choose to edit, unpublish, delete, or clone the entry.
2) Quick Actions enable you to efficiently manage entries directly from the Entry Listing Dashboard, eliminating the need to open individual entries. You can swiftly view content, add it to a list, publish, schedule, or unpublish an entry.
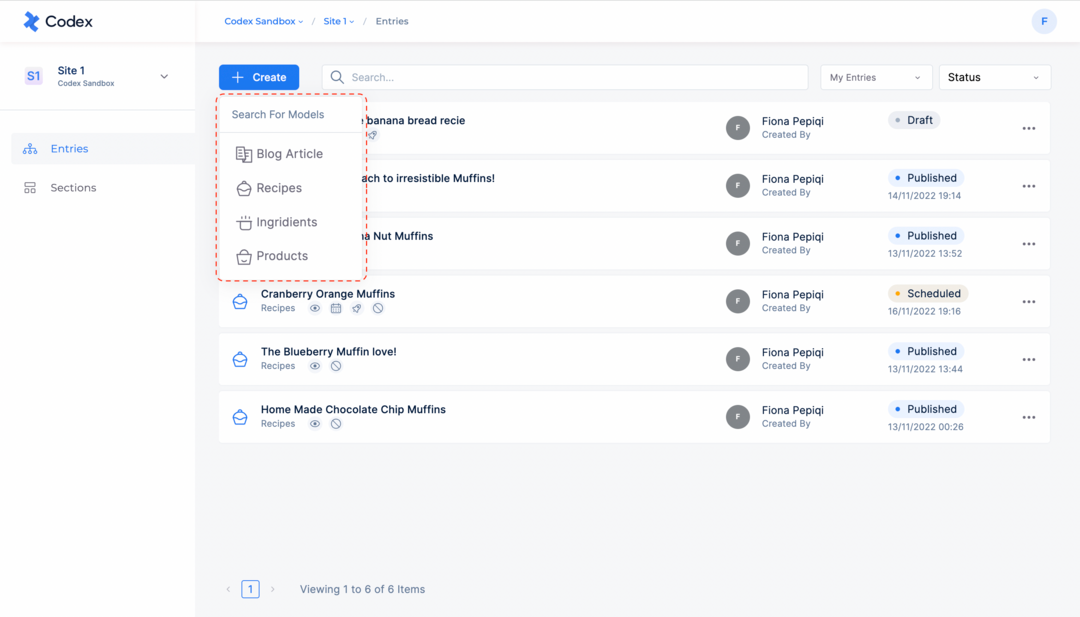
3) The "Create" button serves as the initial step in creating a new entry. Upon clicking it, you'll first choose the content model for which you want to create content, and then you'll be redirected to the Content Editor.
4) The Search Bar facilitates the exploration of specific keywords or phrases in the titles or bodies of entries. The results will display a list of entries matching your search term, based on the configuration of the entry models.
5) The Filtering button opens a dropdown menu, allowing you to filter entries based on various criteria, including system filters, Codex fields, and searchable entry attributes. After applying your chosen filters, you can save the view using the "Save this view" button next to it.
The status of an Entry can be any of the following:
The Draft status means that the entry is not published yet.
The Published status means that the entry is live and available on the site.
The Scheduled status means that the entry is set to be automatically published on a specific date and time.
The Edited status means that the entry has been edited after being published.
The Unpublished status means that the entry, which was previously published, has been unpublished.
Quick Actions

Quick Actions in Entry Listing Dashboard
You may also want to make quick updates to an entry without navigating to the content editor page. In such instances, just position the cursor over the entry to which you wish to take action, and the following options will become accessible:
The first button enables you to open the content editor in read-only mode for a quick content review.
The second button enables you to add an entry to an existing list.
The third button enables you to schedule an entry that hasn't been published yet.
The fourth button enables you to swiftly publish or unpublish an entry depending on its current status.
Creating a New Entry
The Content Editor is the main environment for creating content for your entry. Depending on the content model you are working with, the content editor may appear slightly different. In this example, however, we will be creating an entry for a “Blog Article” content model.
Creating an Entry in Codex
To add a new entry in Codex, follow the steps below:
Select the site where you want to create an entry.
Click on the blue "+Create" button at the top-left of the entries listing page.
Select the Model that you would like to create an entry from the drop-down menu.
You will be redirected to the Content Editor where you can start creating your content.
The Content Editor
The Content Editor is the main environment for creating rich and engaging content. Codex provides a lot of flexibility for editors to create and combine multiple types of content in one place. A combination of existing best text editors, a range of fields, as well as custom fields implemented by Codex provide an advanced WYSIWYG interface, allowing editors to create engaging content.
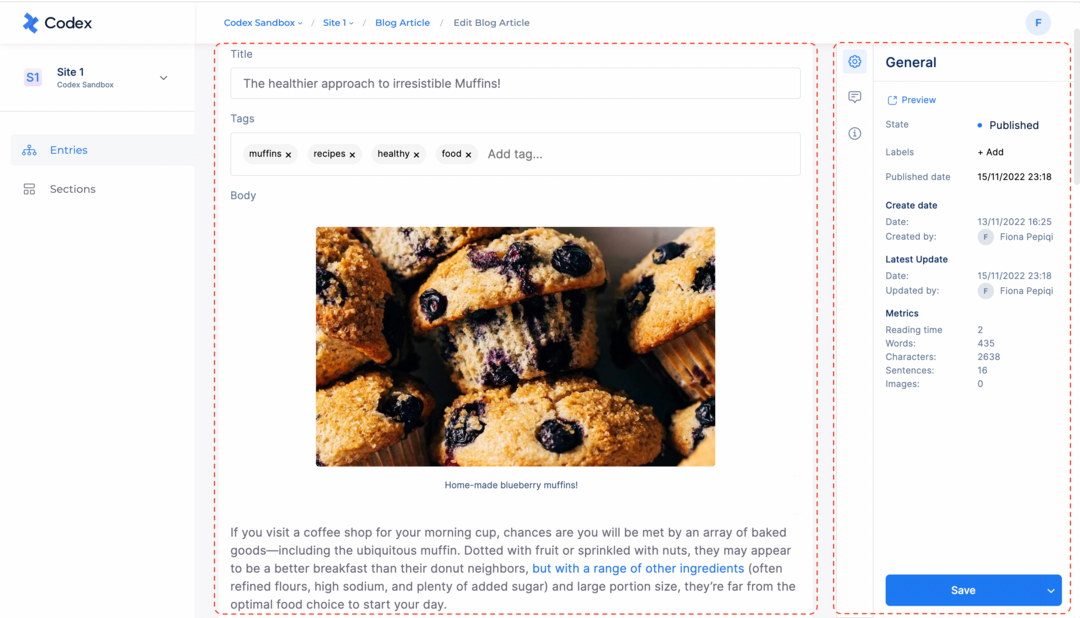
The Content Editor page contains two main parts: the Entry Editor and the Side Panel.
1) The Entry Editor can contain multiple fields to start adding your content, depending on the content model you are using. Each field has a purpose-like preview within the Entry Editor, providing a rich WYSIWYG interface.
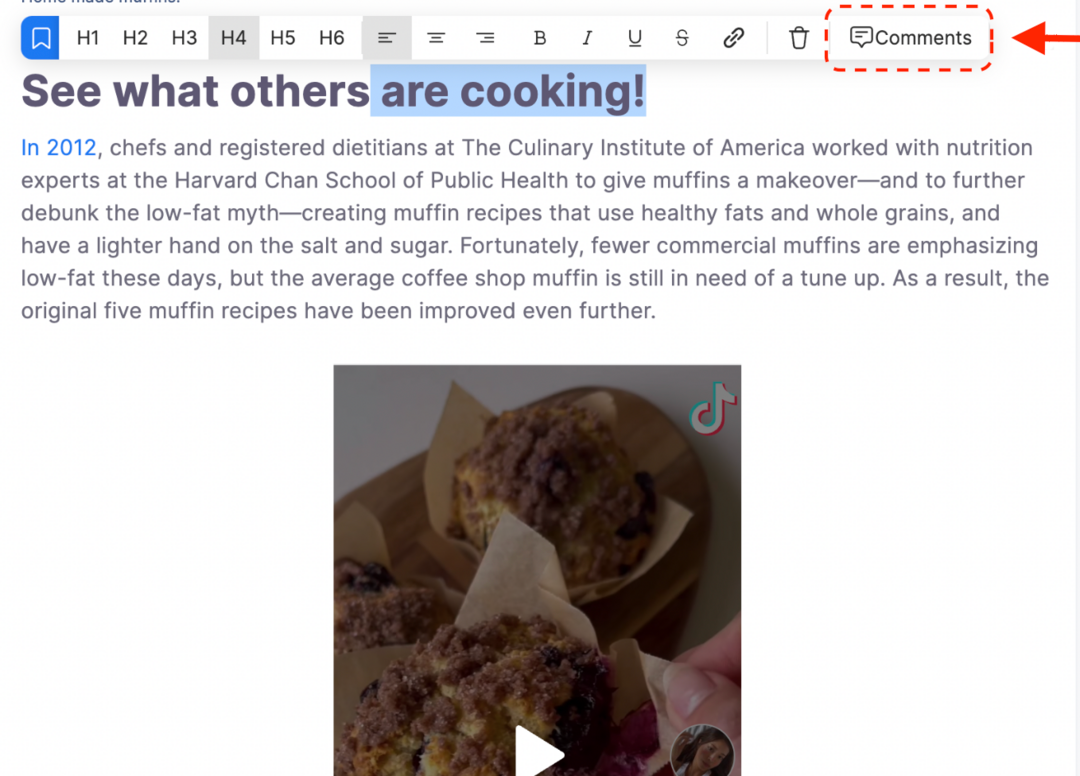
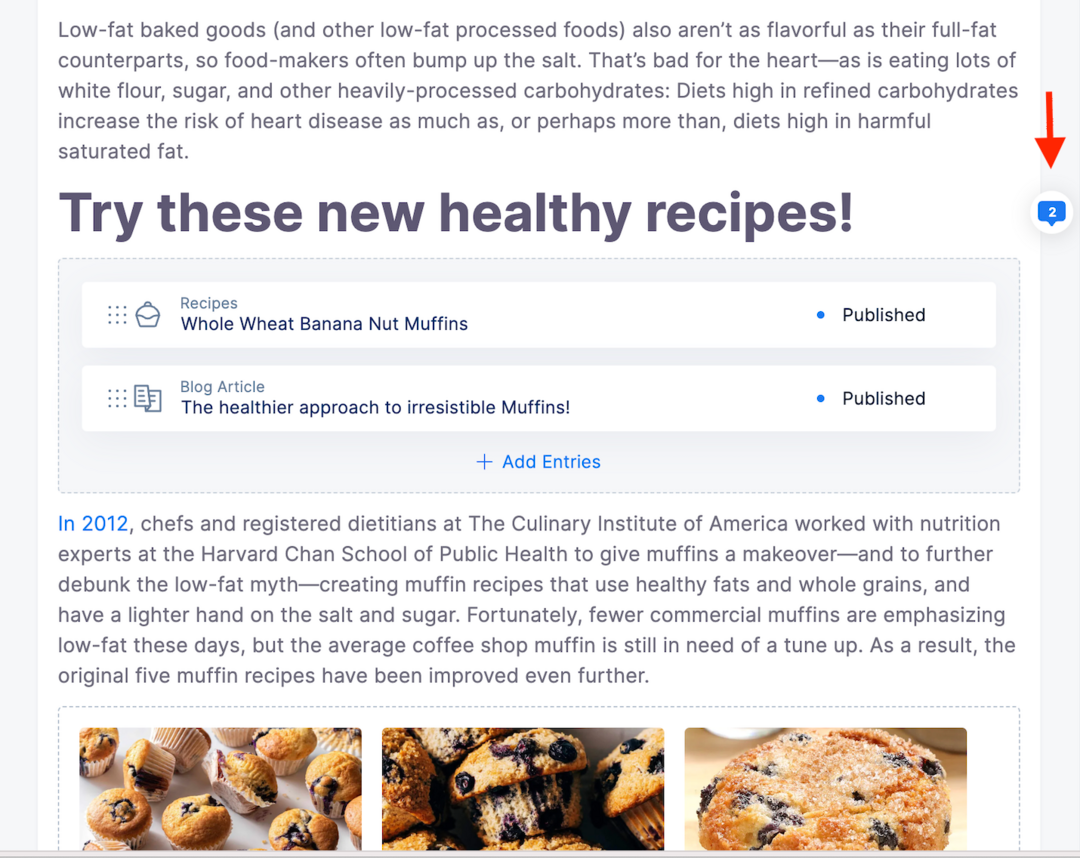
2) The Side Panel provides additional functionalities which are mainly used to manage the workflow, collaborate with other users, or push your story through the publishing cycle. There are four main tabs provided on the Side Panel including the General information tab, the History tab, the Comments tab, or the "Referenced by" tab.
Codex Content Editor
Autosave
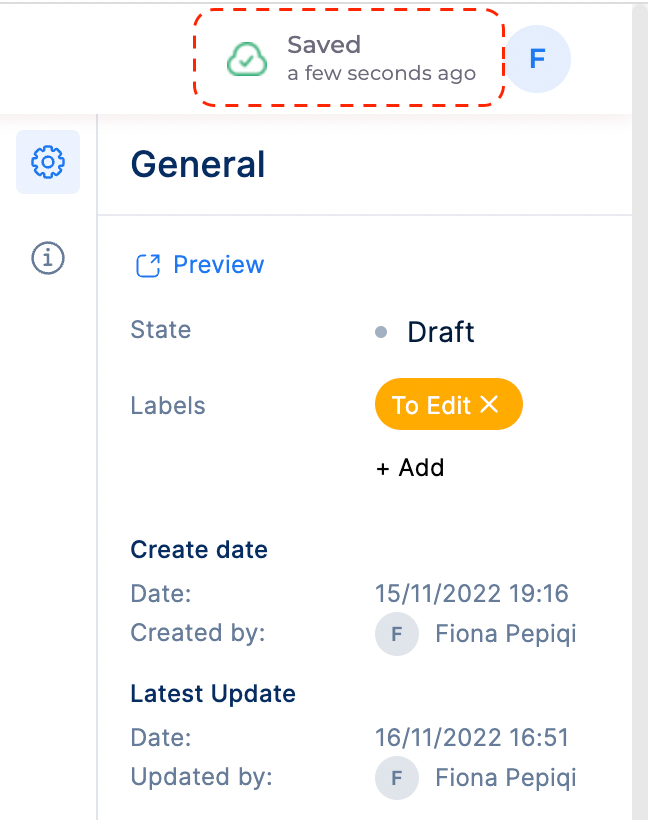
Codex will autosave your content as you are writing, so you don't have to worry about losing your work in case you accidentally switch or exit your page. As soon as you create a new entry and start to add content, your entry will be autosaved in the background as you are writing, before or even after you have Published your entry. You can track the last saved date of your entry in the top-right corner of Codex navigation bar.
Autosave status in the Navigation Bar
Side Panel
The Side Panel is placed on the right of the content editor and it used to display non-content related information, such as entry metadata and other functionalities mainly for internal workflow management. There are four tabs listed in the Side Panel: 1) General, 2) Comments, 3) History, and 4) Referenced by.
Note that Comments tab is only available if you are using a Rich Content Field in your content model. The History and Referenced by tabs will also be displayed if they are configured in the model to be shown in the entry.
General tab
The General tab in the Side Panel displays some basic entry information such as the Status of the Entry, and the Create and Update logs. If you are using a Rich Content Field within your content model, and you have activated the metric calculation configuration, you will also see some content metrics such as Reading Time, Word Count and Character Count among others.
You can use the General tab to add Label(s) to your entry. Labels are primarily used to manage the workflow of content creation, but they can also be used for other purposes such as labeling a 'Paid Article' for internal identification. To learn more about labels, you can refer to the Labels source.
Note that the Side Panel can be configured in the Model Builder, where you can reorder and disable certain details. As a result, your Side Panel may appear slightly different from what you see in the default configuration.

General Tab in Side Panel
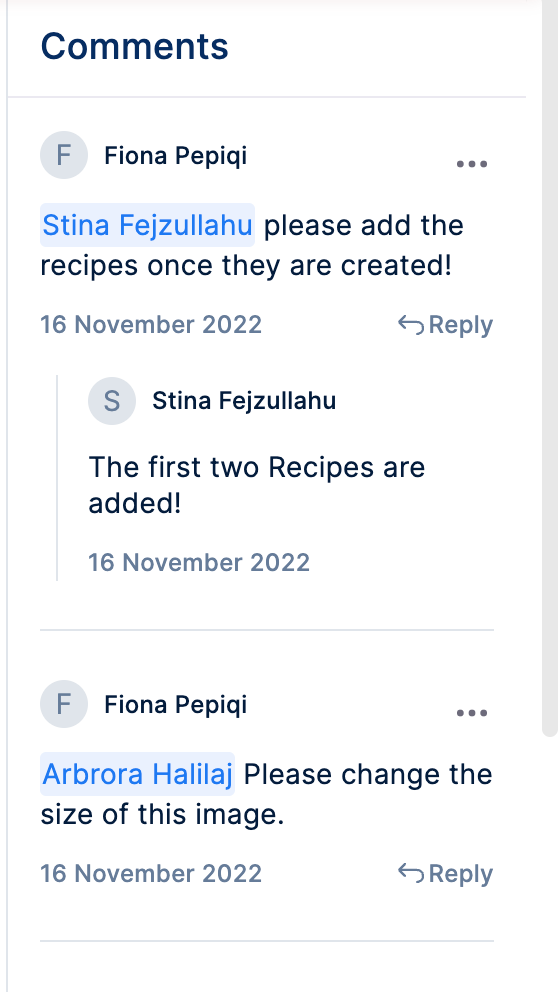
Comments tab
The Comments tab in the Side Panel is used to keep in track all the Comments added in the Rich Content Field within your entry. Generally, the Comments allow you to collaborate with members of your site by adding a comment and even mentioning your colleagues. It lets you keep track of relevant conversations within the entry itself.
Comments in Content Creation
You can add a comment to the Rich Content Field to any block or content type using the editor toolbar. To add a comment, follow the steps below.
Using the Toolbar to add a Comment
Select the item inside the Rich Content Field where you want to add a comment.
Click on the "Comments" button in the editor toolbar.
A box will appear where you can leave a comment for the selected item.
Click on the "Post" button to post the comment.
The posted comments will be shown on the Entry Editor, as well as on Comments tab in Side Panel.
Comment icon in the Entry Editor
Once you have a comment added to your content, you can click on the three dots and the following actions are available to you:
The Resolve option will remove the comment from the Entry Editor, but you will still see it in the Comments tab in Side Panel.
The Edit option will allow you to edit the selected comment (only the creator can edit the comment).
The Delete option will delete the comment from the Entry Editor, as well as from Comments tab in Side Panel.
The Reply option allow you to reply to the comment.
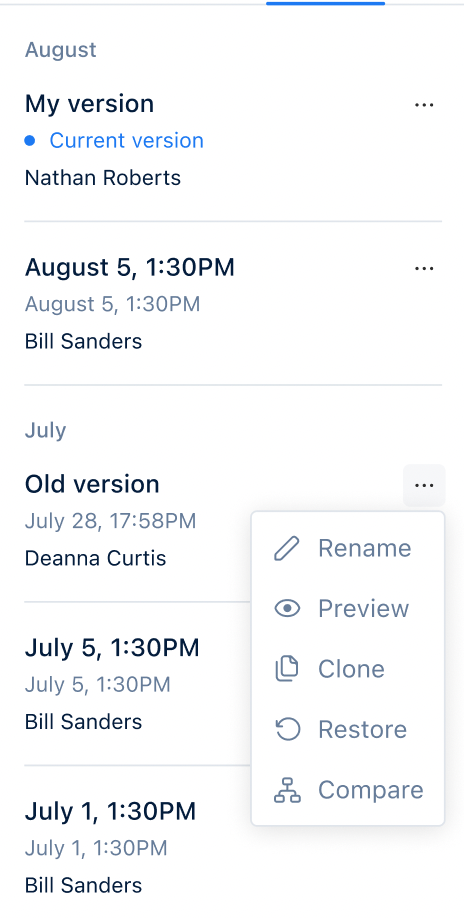
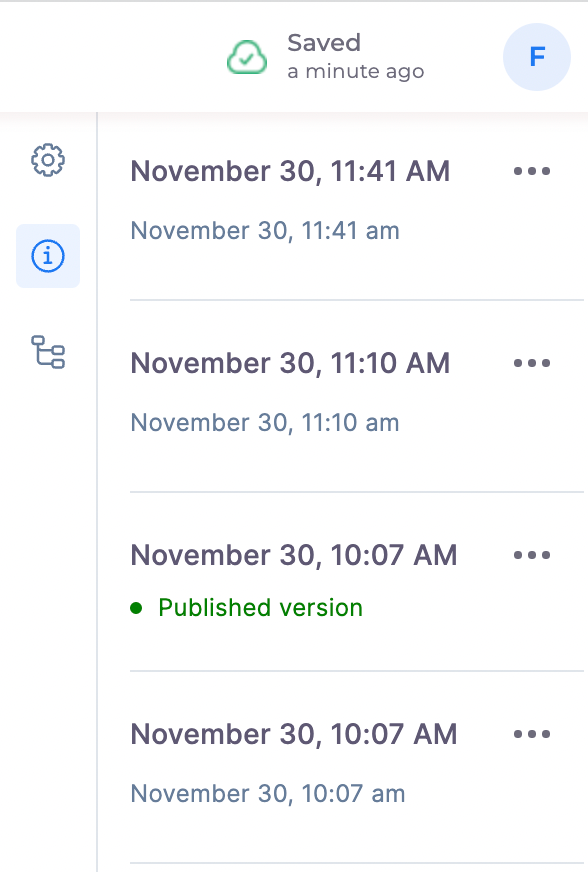
History tab
In the History tab, you can see all the versions of your Entry since its creation. Codex will save a new version of your entry every time you start a new session in the Content Editor. For example, if you start writing your story now, exist the page and come back to it later, there will already be a new version saved to your History tab!
Once your entry has been published, Codex will save a new version of your entry every time you make a change and publish your entry again.
For each version saved, there are a few actions you can do:
Rename (or Edit) the version will allow you to rename the Version to something that is meaningful or can better identify the specific entry version.
Preview option will open a preview in Content Editor of that particular entry version.
Clone will allow you to clone the version in a new Entry (coming soon).
Restore option will allow you to restore the version (coming soon).
Compare option will allow you to compare that version, with your current version.
Delete option will allow you to delete the selected version.
Entry versioning in Codex Content Editor
The published version of your entry is indicated with a green "Published version" label in the History tab. You can always go back to that version or preview it using the options mentioned above.
Published Entry version in History tab
You can also compare any of the previous versions of your entry, with the current version. To do that, click on the 3 dots by any of the versions and select the "Compare" option. A comparison view will open which will show the difference between each field of the two versions.
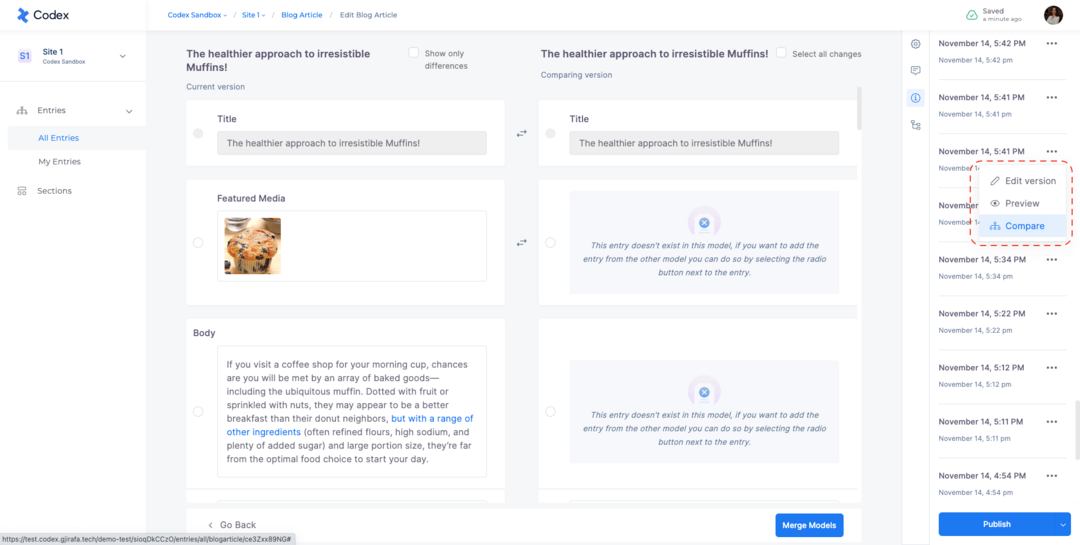
Comparison Tool
Referenced By tab
The Referenced By tab shows all the entries which have referenced the current entry. For example, if you are writing multiple articles and linking them as "Related Articles" in a Reference Field, you will be able to see it all in this tab.
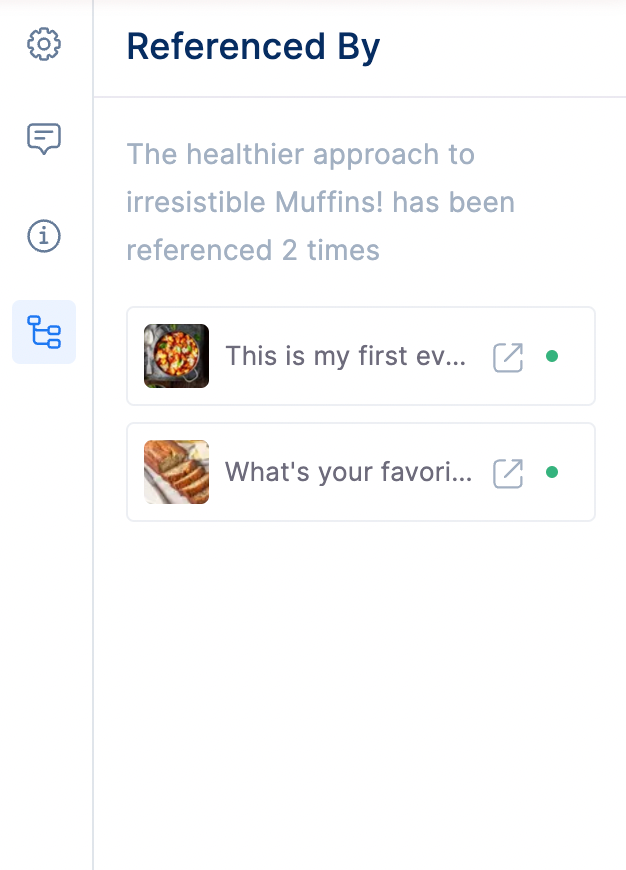
Referenced By tab in Side Panel